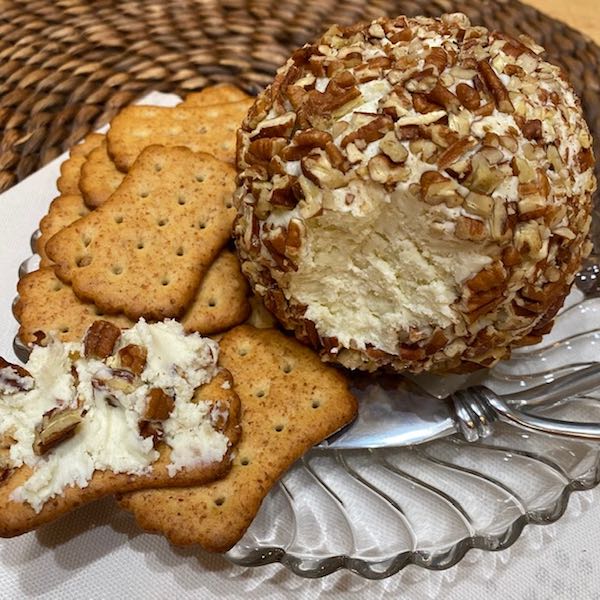


Eleanor's Cheese Ball
Equipment
- Food Processor
Ingredients
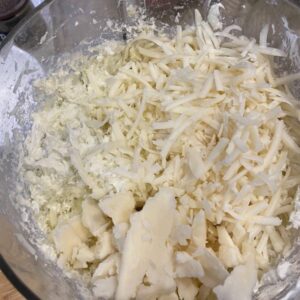
- 8 ounces sharp cheddar cheese, shredded
- 1 clove garlic, minced
- 8 ounces cream cheese
- 4 ounces blue cheese
- ¼ cup butter
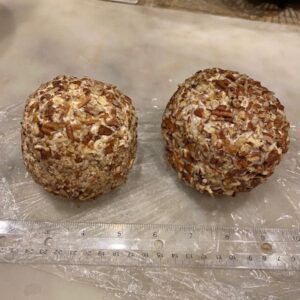
- ⅓ cup pecans or walnuts, crushed/chopped
Instructions
- Shred the cheese and set aside.
- Mince the garlic or put it through a garlic press.
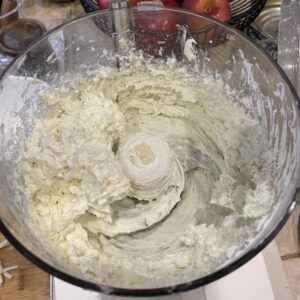
- Drop chunks of the cream cheese into the food processor and turn it on. While it is running, drop in the butter and blue cheese. Stop the food processor when well combined. Add the shredded cheese and pulse till combined.
- Move the cheese mixture to a bowl, cover it with plastic wrap and chill for 3 hours.
- In the meantime, chop the nuts and set aside.
- Divide the cheese mixture into two and shape each half into a ball. Roll each of the balls in the nuts.
- If not serving immediately, wrap each ball in plastic wrap and refrigerate until 20-30 minutes before you're ready to serve with your favorite crackers.
Notes
Cheese balls can be made a day or two in advance and kept in the refrigerator until ready to serve. I do find that a good wheat cracker complements the cheese the best, though you can use whichever cracker you like. My grandmother always used Pepperidge Farm wheat crackers (the best) or Wheat Thins (in a pinch), so that's where my flavor memory goes.
You can wrap these very well in plastic wrap and then in foil and freeze for a month or two - which can come in handy during the holiday season. Once you've served it though, just reform and rewrap then refrigerate it for up to a week - though I doubt it will last that long.